 High School built #Abstract2Actual in 8 weeks
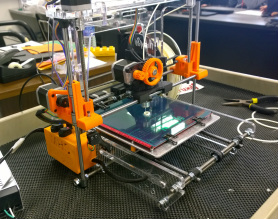
 My Airwolf3d v5.5 is based on the open source Prusa-Mendel design. Much of today's 3d printing is founded on the concept of a "free" self replicating rapid prototyping machine, a.k.a. reprap. Not only is the software used to run the machine freely available to the public, in many cases, the hardware designs are too.
Free, in this context, doesn't mean it doesn't cost anything. It just means that anyone is freely licensed to use, copy, study, and change the software in any way, so long as they comply with the license terms. I donated to Slic3r and Pronterface, two of the opensource projects that I regularly use. I was also compelled to find a way to give something back to the community since I was getting so much from the people who make free 3d printing possible.
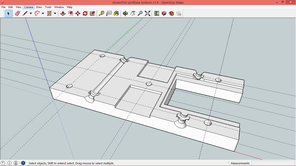
I decided to take my Airwolf3d v5.5 and use it to help the local high school engineering students build a 3d printer of their own. I knew that they had an engineering program and that they used 3d modeling software as a part of their curriculum. They were able to design lots of things, but were limited to building puzzle cubes with wooden blocks. It was the only affordable build option they had.
I purchased an Airwolf3d v5.5 kit for the school, We used my printer to print out the structural components, gears, mounts, etc, in school colors. We also re-designed a custom electronics case with the school name on it. They named their machine JOOS.
In the middle of printing parts for the 3D printer, the students wanted to know what other kind of things they could make with this machine. We took a detour to thingiverse.com and the students picked out this model to build. Thingiverse is a great website where you can share and download 3D designs.
Free, in this context, doesn't mean it doesn't cost anything. It just means that anyone is freely licensed to use, copy, study, and change the software in any way, so long as they comply with the license terms. I donated to Slic3r and Pronterface, two of the opensource projects that I regularly use. I was also compelled to find a way to give something back to the community since I was getting so much from the people who make free 3d printing possible.
I decided to take my Airwolf3d v5.5 and use it to help the local high school engineering students build a 3d printer of their own. I knew that they had an engineering program and that they used 3d modeling software as a part of their curriculum. They were able to design lots of things, but were limited to building puzzle cubes with wooden blocks. It was the only affordable build option they had.
I purchased an Airwolf3d v5.5 kit for the school, We used my printer to print out the structural components, gears, mounts, etc, in school colors. We also re-designed a custom electronics case with the school name on it. They named their machine JOOS.
In the middle of printing parts for the 3D printer, the students wanted to know what other kind of things they could make with this machine. We took a detour to thingiverse.com and the students picked out this model to build. Thingiverse is a great website where you can share and download 3D designs.
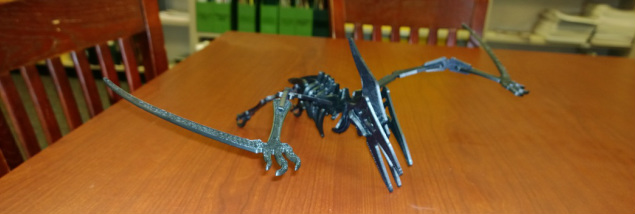
Students wanted to print something useful. So we downloaded this pteradon from thingiverse.com

 RSS Feed