Abstract2actual
  • Home
  • Blog
  • Gallery
  • Buy stuff
  • Contact
  • About

Build a Prosthetic Hand Part 3

7/29/2014

1 Comment

 
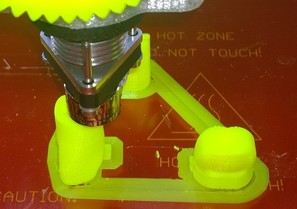
I've been tinkering with a few pieces of the finger plate trying to manually add support for the small overhangs since the system generated support is overkill.  I finally got that worked out on a few pieces and printed them in 3mm yellow ABS.  My hope was that once I got the support figured out, I'd print these in 3mm Taulman Bridge Filament.  Following recommendations I scraped up on the web, I found that this nylon does a really good job sticking to the bed heated to 70 with a thin layer of Elmer's glue spread on it.  The brim and first few layers
Picture
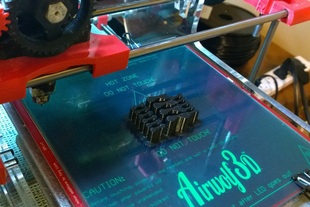
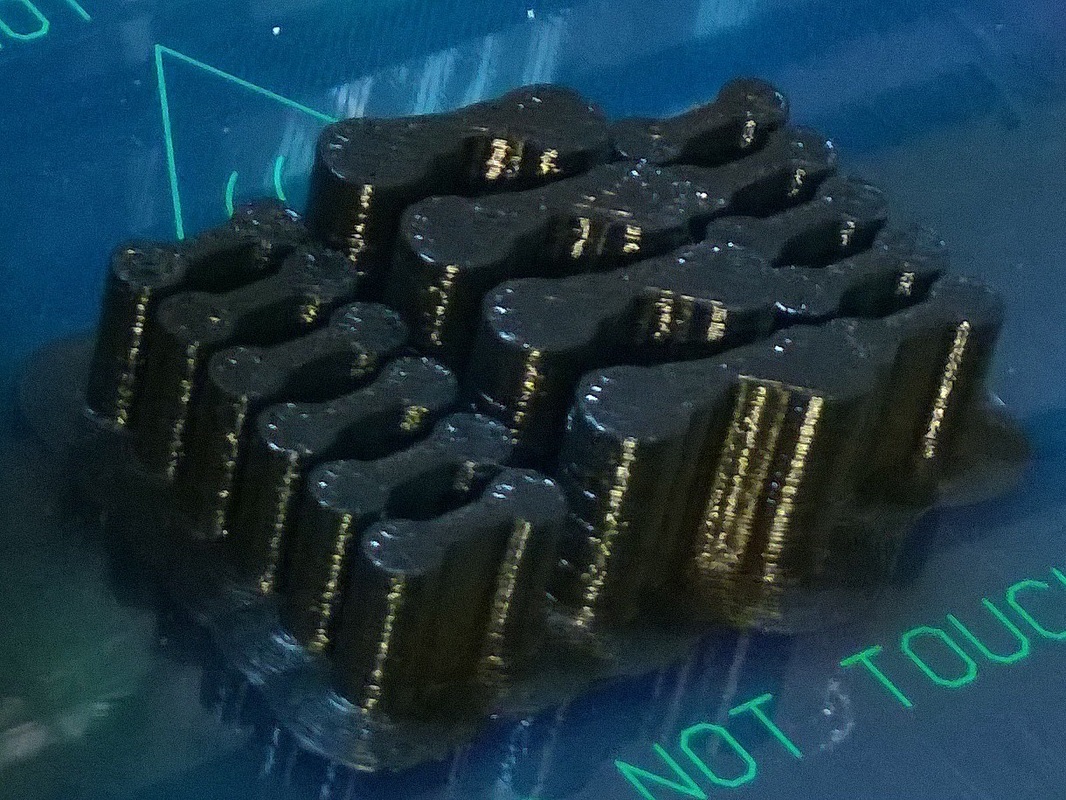
Modified finger plate (ABS)
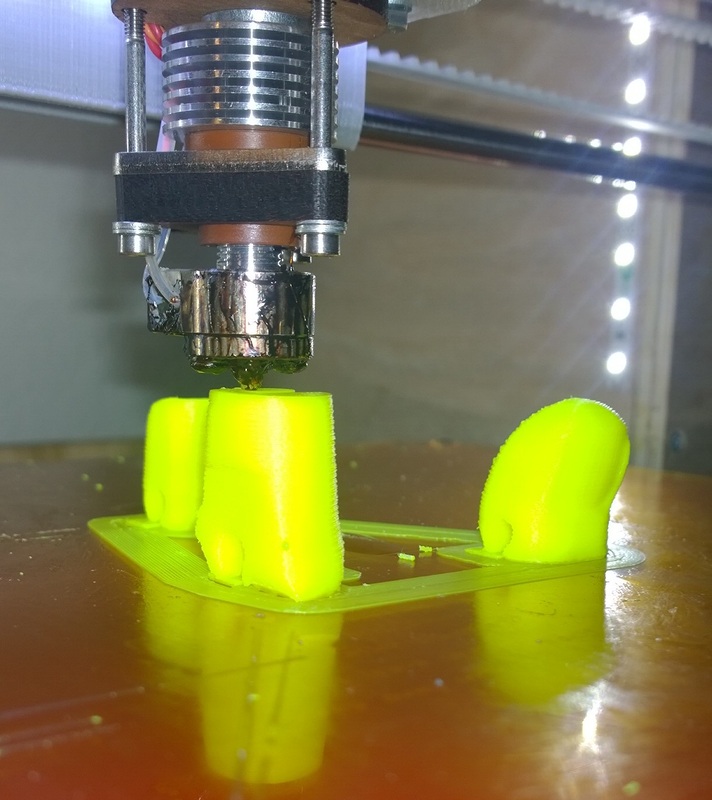
printed well and stuck really nicely to the bed, but once the print job got up between 2 and 3 mm, the hot end would jam.  After a few failures like this, I manually retracted the filament and measured the diameter at the tip.  It was 3.15mm, which prevents it from moving into the heated part of the nozzle. I reduced the retract length and increased extrusion temperature which allowed for another half mm of print height before jamming.  I suspect this has something to do with my retracts, which have to be a little longer than ABS retracts in order to minimize oozing.  After many hours of trial and error, I still cannot get the nylon to print reliably on X3REX (my modified Prusa i3).  I've decided to print in red ABS until I can figure out the right configuration for the nylon on this printer.  Time spent trying to print nylon parts 4:15

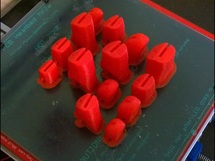
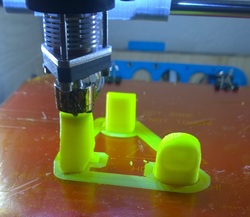
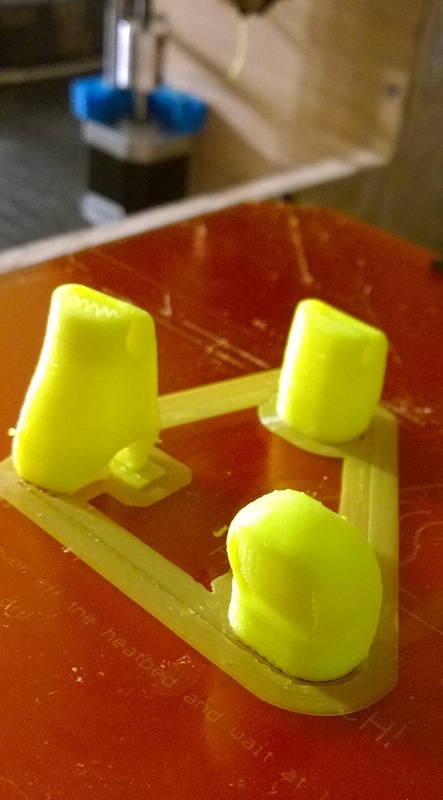
I modified the finger plate .stl file, adding the manually defined support elements to all the pieces.  Since I already had a spool of 3mm red ABS installed on the Prusa i3, I printed the finger plate there.  Print time was 6:08.  With a 4mm brim and the new supports, the pieces all turned out really well.  I only had to do a little trimming with an X-Acto knife to get the brim and supports cleaned off.  Cleaning the brim off of the joint (hinge) material was a little more difficult since the pieces are so small and the flexible PLA sticks together so well.  Putting the fingers together was like putting together a puzzle.  There is a diagram with the design files, but many of the pieces look so similar that it's hard to tell if you've got the right joints with the right fingers.

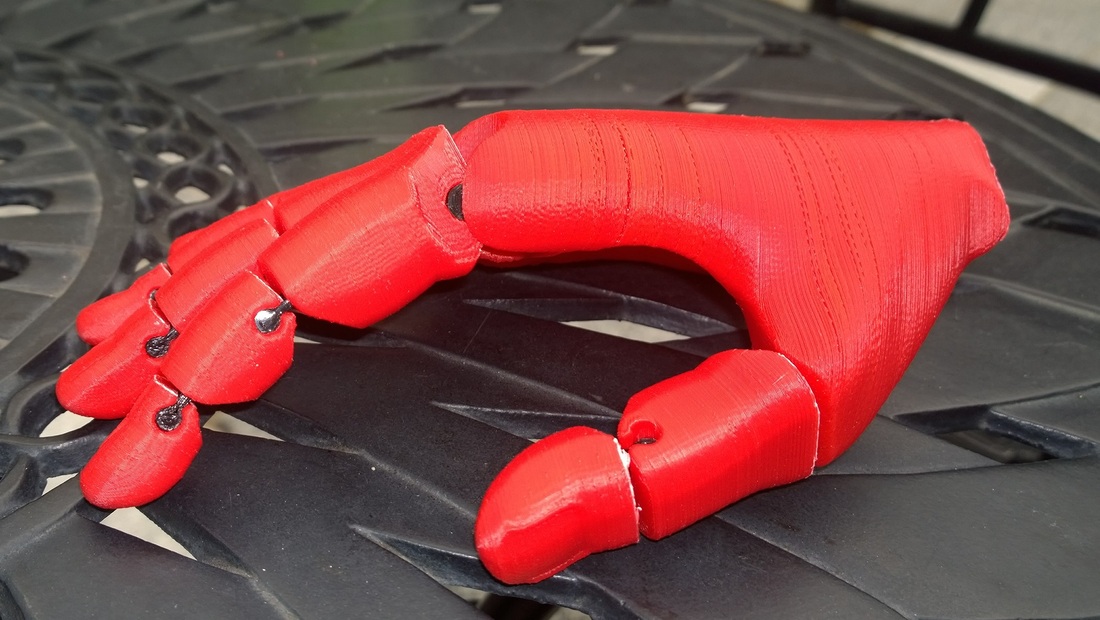
I decided to also print the hand body in red ABS, and I printed it on X3REX since it is a quieter machine than the Prusa i3.  This print took 6:24.  As I feared, there was some layer seperation, and the holes for the tendons got a bit clogged up.  Although I am going to have to reprint it, the piece printed well enough to use for testing fit and finish.  Installing the palmar digital joints was tricky.  I wound up using a screwdriver to compress the pieces and stuff them down into the palm body.  The fingers were pretty easy to press onto the joints from there.  The result is this pretty cool looking red hand.

I'm going to have to reprint the palm body in nylon to resolve the layer separation issue.  I am pretty sure I'll be able to do that on my Airwolf3d v5.5 since I have a nylon configuration file that works really well on that machine.

Flexy-Hand #Abstract2Actual: 43:29 and counting

Picture
Flexy-Hand #Abstract2Actual: 43:29 and counting
Picture
1 Comment

Sharing ideas

7/27/2014

0 Comments

 
Today I posted some of my designs on Thingiverse.com.  I've downloaded and printed lots of cool designs from the site and thought I'd share some of my own work.

I posted my streetlamp files HERE
I posted my Mexican Bulldog Collars HERE


0 Comments

build a phone stand

7/20/2014

0 Comments

 
PicturePhone stand parts, still hot on the press
I have a Nokia Lumia 1020, a Windows phone that I like to watch videos on.  There are two small problems I have doing this.  First, the phone will not stand up on its own, and won't stay standing if I lean it against something. Second, the speaker is on the side of the phone, which means, if I do manage to get it to stand up, I don't get the full sound because it is directed 90 degrees away from me.  I'm going to build a three piece stand with two uprights and a brace to hold them.  the upright on the right side has a curved piece to channel the sound around to the front.

It took me 36 minutes to design the stand in Google SketchUp.  It took another 18 minutes to prepare the printer, and slice the file.  Part of the printer prep time was switching to 3mm black ABS plastic from the flexible PLA that I used for the finger joints on the prosthetic hand project.  Printing all three parts took 2:19 on my Airwolf3d v5.5 printer.  After 7 minutes of cooling, i popped the parts together and found a couple of problems.

The brace didn't fit as snugly as I expected, so the uprights would wobble around and the phone could fall out of it.  Also, I didn't take into account that the lens on the back of this phone protrudes another 3mm from the back of the case, so instead of sitting all the way back against the brace, the top tilted forward, which put the speaker forward of the sound channel, rendering that feature useless.  Finally, the uprights were just at the edges of the phone, which left no room for error when placing the phone in the stand.  It only took two minutes to figure this out.

All of these problems could be resolved by making a few tweaks to the back brace.  The uprights could be used as they already were.  I went back to SketchUp and made corrections to the back brace, which took  11 minutes.  Prepping the printer and slicing the .stl file only took 3 minutes, since there was no filament change-out required, and I started heating the printer when I sat down to redesign the brace.  Reprinting the brace took 44 minutes.  It only took 2 minutes to cool the part and get it off of the printbed because I shut off the bed heater during the last 5 minutes of the print job. #Abstract2Actual 4:12

Picture
First version of phone stand
Picture
Nokia Lumia 1020 phone stand #Abstract2Actual 4:12
0 Comments

build a prosthetic hand part 2

7/19/2014

0 Comments

 
Today I printed the finger joint hinges using my Airwolf3d v5.5 printer.  I printed them out of FormFutura Flex EcoPLA.  Slicing and printer prep took 10 minutes, the print job itself took 2:22 using a rather slow 30mm/sec print speed.  I printed all 15 pieces in a single print job.  Since they're small pieces, I printed them with a 5mm brim, to help keep them stuck to the print bed.  This worked out really well, and I think these pieces printed a lot cleaner than anything else I've printed with the flexible PLA.  The only other notable configuration change with the flexible PLA is a 4mm retract, which is twice what I use with rigid ABS.  The flex seems to ooze a bit more than rigid plastic.  The extra retraction takes care of this which prevents strings from forming between parts and gives nice clean perimeters.  You can find a good description of extruder ooze and how to prevent it, inthis article at www.slic3r.org

Flexy-Hand #Abstract2Actual: 26:52 and counting
Picture
Picture
0 Comments

Build a prosthetic hand part 1

7/17/2014

1 Comment

 
Picture
I've decided to 3d print a prosthetic hand for a networking event next month. I figured this would be a really cool way to showcase the complexity of what you can do with a 3d printer.  I'll keep track of the time I spend on this, which I imagine is going to be a lot.

I'm starting with an open source design Flexy-Hand 2, designed by Steve Wood at Gyrobot Ltd.  According to an article on 3Dprint.com, Jeff spent about 20 hours designing the hand.  I spent about 2 hours this evening studying the design and figuring out the best way to print it.  The files, which are available at Thingiverse.com are already laid out for printing, but there are some overhangs that are going to be a problem with my printer.  I added support material, but it ends up being too much support along the sides of some of the phalanges where it really isn't necessary, and will be a beast to get off.  So I'm manually tweaking the finger plate a little to include support for those overhangs.  Someone probably knows an easier way to configure the support material, and there may be a better slicer program out there for this sort of thing.  If you know of anything, let me know.  Until I learn a better way, I'll just add some little blocks to support the overhangs.

I printed out these three pieces in 3mm yellow ABS to see how my support elements worked.  They are too thick and poorly placed, so I'll try again tomorrow. They do look pretty cool though.  Ultimately I'm going to print most of the hand out out of 3mm Taulman Bridge nylon.  This is a newly formulated nylon that resists curling much better than earlier 3d nylon blends.  I'm thinking I'll use flexible PLA  which I got from 3Dsupplyworld.com, for the joint material, but I'm not completely set on that yet.  Nylon is pretty flexible and I may be able to tweak the filament, density, and wall thicknesses enough to use nylon throughout.

Flexy-Hand #Abstract2Actual: 24:20 and counting (including Jeff's design time)


Picture
Picture
Picture
1 Comment

what it takes to design and print a unique item

7/15/2014

0 Comments

 
Today I decided to show how easy it is to have an idea, sketch it out in the computer, and print it out.  #Abstract2Actual for this key ring is 31 minutes.  In the interest of keeping the video short, I speed up the video, which sounds really funny while I'm talking in the video.  I'll work on my video editing skills, but for now, here is what I could produce.
0 Comments
    View my profile on LinkedIn

    TJ Emsley

    Lifetime tinkerer.

    Archives

    October 2022
    January 2021
    November 2020
    October 2020
    September 2020
    February 2018
    January 2018
    January 2017
    October 2016
    August 2016
    July 2016
    June 2016
    May 2015
    April 2015
    March 2015
    February 2015
    December 2014
    October 2014
    August 2014
    July 2014
    May 2014
    April 2014
    March 2014
    November 2013
    October 2013

    Categories

    All
    3d Design
    3d Printing
    Open Source

    RSS Feed


Proudly powered by Weebly