Abstract2actual
  • Home
  • Blog
  • Gallery
  • Buy stuff
  • Contact
  • About

7 Day Challenge: A Doo-dad A Day

2/12/2015

0 Comments


Day 7: Ball in a cage

Picture
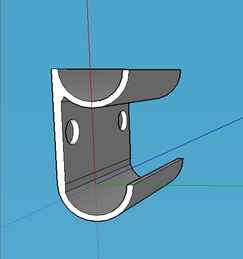
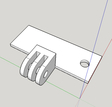
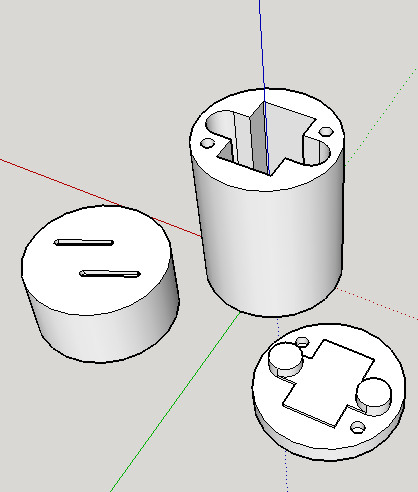
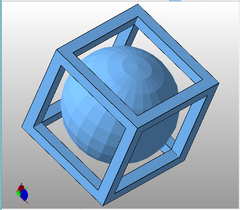
netfabb rendering of a ball in a cage
A friend suggested I print something that can only be mechanically produced on a 3d printer for my last day of the challenge.  I was thinking of some rather complex things, like an airplane in a hangar, but I had to go with something simpler because I am running short on time.  You see, I failed to take into account that I was going to be driving 7 hours after work yesterday.  Considering the late start, I picked a ball in a cage for today's project.
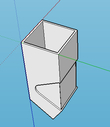
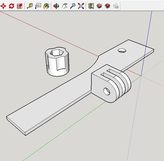
Designing this in Google SketchUp wasn't too difficult, although I did have to do a little research to figure out how to create a sphere.  Once I got that down, building the cage around it was pretty simple, just a bunch of straight lines and erasing a few planes that created themselves.  I had to add a frangible 3mm X .2mm thick circle at the bottom of the sphere to hold it to the print bed during printing, but being so thin, it will easily break away after printing is complete.


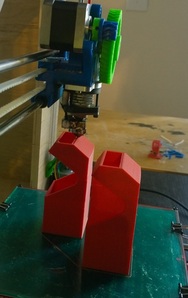
I originally designed this to be a 2.5cm (1 in.) sphere within a 2.5 cm square cage, but on the first print attempt, with my Airwolf 3D v5.5 printer, I saw that this was so small that the layers weren't cooling fast enough for the subsequent layer to form correctly.  In order to resolve this, I scaled it up 150% and added a second one to the print job.  This way, the layer on the first object has time to solidify as the layer on the second object is being printed.  
The only drawback is that it will take almost 4 hours to print, which will exceed the time limit I set for myself on the 7 day challenge.  Since I don't have a paycheck riding on this, I can live being a little late. ; )
2/12/2015  7:30pm
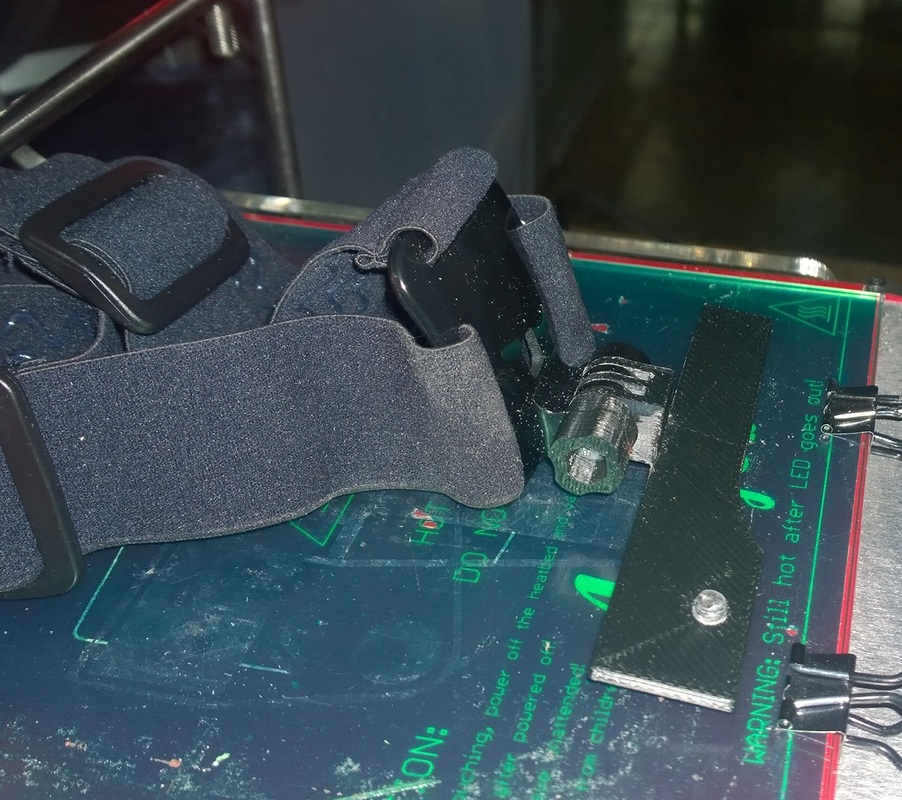
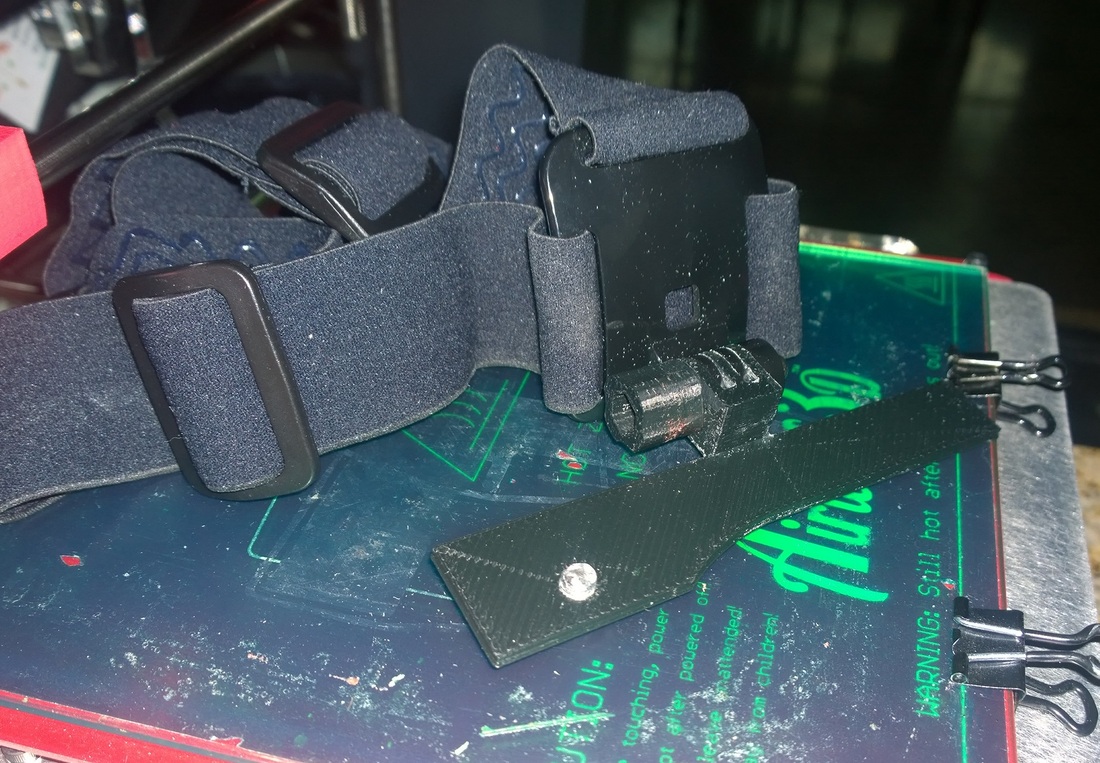
The print job completed at 7:15.  I had to do a little cleanup with a small file to remove strands from the overhangs and to remove the support disc off of the bottom of the ball.  They turned out really well.  I'll be making some adjustments to the print profile to get them to print a little cleaner in the future.
Picture
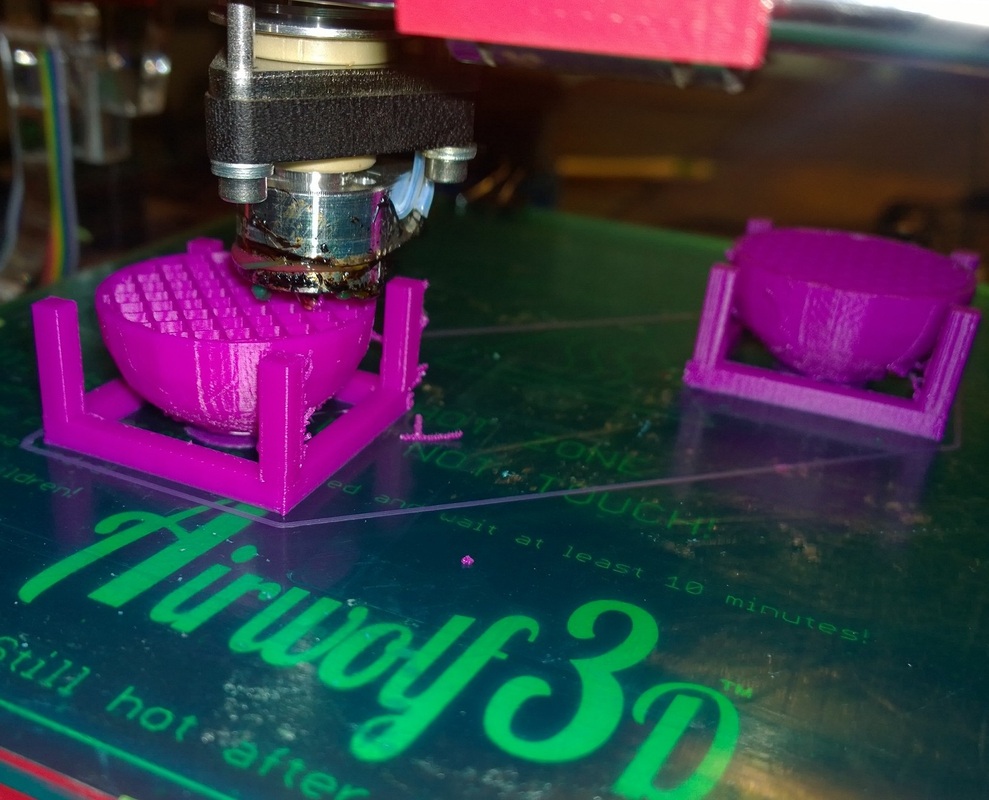
Cageball, mid way through the print job.
Picture
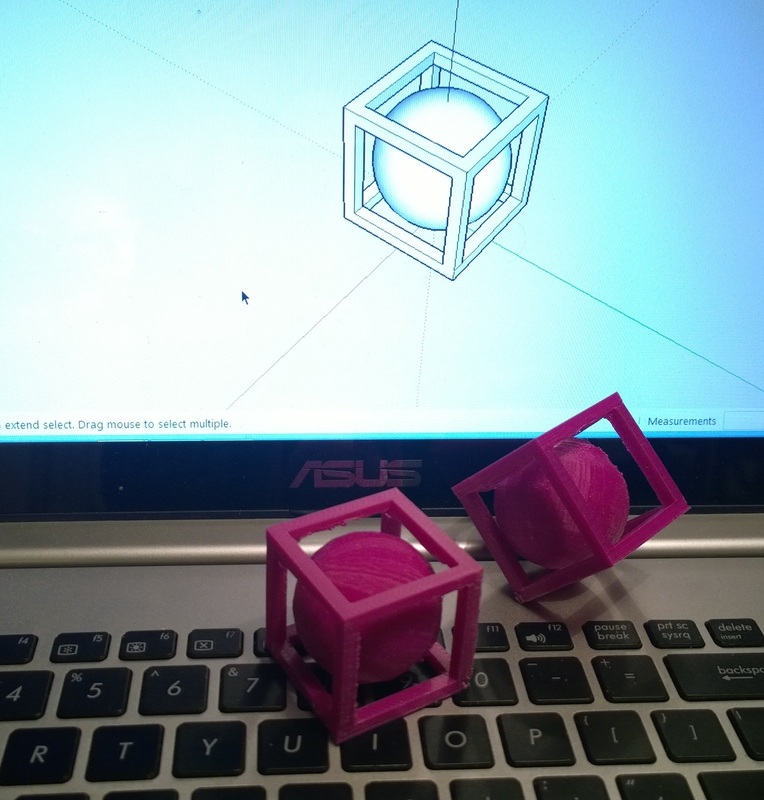
Cageball #Abstract2Actual 4:26
0 Comments

7 Day Challenge: A Doo-dad A day

2/10/2015

0 Comments


Day 6: Nespresso capsule dispenser

PictureNespresso dispenser design (including support)
For those of you who don't know. Nespresso is a brand of espresso/coffee similar to Keurig, only better.  It uses single serving containers known as "capsules" that come in a tall square sleeve.  Nespresso makes all sorts of dispensers for the capsules, but they're expensive.  I want to make a modular dispenser that you can mount to the wall or inside a cupboard door with a 3M command strip.  The idea is to print as many or as few dispensers as varieties of coffee you keep on hand.  You can also print them in different colors, to correspond to the capsule sleeves.  I made two designs, one having the dispensing hole filled in with support material, and the other, unsupported.  I did this because I'm just not sure that the 40mm span across the opening will print very well as an open space.

Picture
Printed dispensers on red ABS
After printing these, I find that the opening is way too big.  I'll call this day in the challenge a successful attempt at identifying something that doesn't exactly work.  I'll keep this one for further development because Day 7 of the challenge has already begun.
0 Comments

7 Day Challenge: A Doo-dad A Day

2/9/2015

0 Comments


Day 5: Dry erase marker holder

PictureFinal design
I moved to a new office at work where the dry erase board has no tray to hold the markers.  I want to make a holder that is held on to the board with a magnet.  The first design took about 20 minutes.  It had a singlemagnet in the center of the holder.  Printing took an hour, and upon testing it on the fridge in my apartment, I found that the magnet is not quite strong enough to hold two markers.  Also, with the magnet in the center, the marker has to be perfectly centered or else the holder tips to the heavy side.  I could use a command strip instead of a magnet, but I want the ability to move the holder around on the board if I need to, so magnets are a must.  To fix the stability issue, I doubled the width of the holder, added another magnet recess, and moved the magnet recesses out toward the ends of the holder.

Using the original design, it took an hour to print two units.  The modified design took an hour and 20 minutes to print a single unit.  I saved some time by printing on two printers at the same time. I printed the blue one on the Airwolf3d v5.5 and, the red one on my modified Prusa i3.  They finished within minutes of each other, and both work very nicely.  With the two holders, I have the capacity to hold 4 markers on the board. 
The design file is available on Thingiverse.com as thing 675232. 
The design file is also available at redpah.com product 1318.
Picture
This original design was not stable. The markers had to be carefully placed in the center of the holder
Picture
Very stable dry erase marker holder #Abstract2Actual: 3:40
0 Comments

7 Day Challenge: A Doo-dad A Day

2/8/2015

0 Comments


Day 4: Translucent panes for Ikea Lantern

PictureTranslucent glow-in-the-dark panes for Ikea Lantern
2/8/2015 10:00am
The Ikea lantern from my day one challenge has clear glass panes in it.  A reasonable choice for a lantern run off of a candle.  But now that the heat source is gone, there's no need for glass panes.  I'd like to convert this into a lantern that a kid can play with, so I'm going to replace the glass panes with translucent glow-in-the-dark panes.  This will also diffuse the super bright LED light into something more eye appealing.
2/8/2015 10:12am
The design is complete consisting of three very thin .5mm panes, and three thicker 2.75mm panes with a honeycomb infill.    I figure the thin panes will pass more light, and the thicker panes will hold the glow-in-the-dark charge longer.
2/8/2015 11:00am
I sliced these for .1mm layers, which didn't work out so well with this glow-in-the-dark filament.  The first layer, which is deliberately printed at twice the normal thickness, printed fine.  But the second layer resulted in an extruder jam.  I've cleared the jam and re-sliced for .15mm layers
2/8/2015 11:10am
Another jam, this time because the filament was twisted on the spool.  I've untwisted the filament and started again.
2/8/2015 11:35am
The first layer printed fine again at .3mm, but the extruder jammed again while trying to print the second layer of .15mm.  I've re-sliced for .2mm layers, which I know from the first layer on the first attempt, should print fine.
2/8/2015 1:38pm
Success! All six panes printed
2/8/2015 2:30pm
Old glass panes removed and new plastic panes installed.  The .5mm panes definitely pass more light as you can still make out the individual LEDs if you look straight at it.  The thin panes also look whiter in color than the 2.75mm panes.  I'm really happy with how this turned out!

Picture
Thin pane shows LEDs
Picture
~~~~~~~ #Abstract2Actual 3:38 ~~~~~~~~ This is the only light on in the apartment
Picture
Afterglow
0 Comments

7 Day Challenge: A Doo-dad A Day

2/6/2015

0 Comments


Day 3: Go-Pro Headmount Adapter

PictureInitial design
2/6/2015 9:08pm
I have a headset designed for a Go-Pro camera.  The only trouble is that I don't own a Go-Pro camera.  The challenge today is to build an adapter to mount my Nokia Lumia 1020 to this headset.  This design took 24 minutes.

PictureCamera Mounting Adapter
2/7/2015 6:15pm
I've had a little trouble getting this built today.  First, my extruder jammed and I couldn't clear the nozzle.  I ended up switching out the .35mm nozzle for a .5mm.  I realized I was going to need a knob and screw to hold the adapter onto the headgear.  I also extended the base of the adapter to extend the entire length of the phone.  The new design is shown to the right.
  I printed both pieces and found the hex head on the screw fit just a little too tightly in the knob.  The fins were a little too thick.  Also the screw mounting hole was too close to the head mount, causing the camera to be crooked.  I made changes to the design file and printed them out again.  Total design time was about 2:30.  Print time for both pieces was 59 minutes.  I had to do a little cleanup with a file and this time everything worked out.  Cleanup time was about 10 minutes. 

Picture
Nokia Lumia camera adapter for GoPro headset.
Picture
Nokia Lumia camera adapter for GoPro headset. #Abstract2Actual 21:15
0 Comments

7 Day Challenge: A Doo-Dad A Day

2/5/2015

0 Comments


Day 2: Custom Business Card Holder

2/5/2015 8:45pm
I have business cards on my desk, just laying around, looking all messy.  And I have two different cards, one for the job that actually has a paycheck associated with it, and one for Abstract2Actual.  I'd like to have something to hold both stacks of business cards, maybe with a company logo on it.  I chose a little simpler project today because I don't want to be up until 2 in the morning again tonight.  I plan to do the design this evening, then print it in the morning since I have the day off tomorrow.
2/6/2015 8:55am
I finished the design file in about 55 minutes.  It's a very simple design consisting of a set of flat plates that will be glued together.  I didn't put the logo on because I couldn't get the dimensions right before my print start deadline of 9:00 am. This self imposed deadline is because I need to go get a hair cut at Daniel Davis Salon. : )  I'm printing this in two colors, using my Airwolf3d v5.5  for thegreen parts and my modified Prusa i3 for the blue.  Printing started at 9:02, and expected to finish in 1:03. 
Picture
SketchUp design for business card holder
11:18
Printing the missing piece completed a few minutes ago, and I just assembled the card holder.  Turned out pretty nice.
Picture
Prusa i3 printing in blue and Airwolf3d printing in green
Picture
Business Card Holder #Abstract2Actual: 3:13
0 Comments

7 Day challenge: A Doo-Dad A Day

2/4/2015

0 Comments


Intro:

I thought it would be kinda fun to see if I can design and print a completely new and unique object every day for the next week.  I'll give myself 24 hours to come up with an idea, design it, and print it.  At the end of the 24 hours, I'll post my progress.  Whether I've finished or not, I'll move on to a new doo-dad.  Realize that I still have a day job, and will probably want to get some sleep, eat, etc.  I'll also still be working on some other projects, like the Tricopter yaw motor mount.  This will not be an easy challenge.  But if it were easy, why do it? : )

Day 1: LED lights for Ikea Lantern

Picture
02/04/2015 7:15pm
I have this lantern from Ikea that is designed to hold a tealight candle.  I'd like to put a coiled up strip of LED lights in it.  The LED strip is designed to run off of 12VDC power, but I know from experience that it will actually run off of a 9 volt battery. My plan is to design a cylinder that will house a 9 volt and two AAA batteries that is wrapped by the LED light strip.  This would give me 12 volts and maximum burn time.  If push comes to shove however, I'm not above scrapping the triple A's and just running it off of the 9 volt. 
~~~~~~~~~~~~~~~~~~~~~~~~~~~~~~~~~~~~~~~~~~~~~~~~~~
Below
is the design that I created in Google SketchUp for the battery holder.
It took me 2:15 to complete this design and slice it with Slic3r for printing.  The Pronterface print controller reports that it will take 2:28 to print. 

The piece on the left is the top.  I'll just pass some copper wire through it to make battery contacts, and glue it to the body of the battery holder.  The battery holder is oriented to be printed upside down, so what you see in the picture is actually the bottom of it.  I was able to design it to hold the 9 volt and the two triple A's.  The LED strip is going to wrap around this assembly.  Based on the height and diameter, it looks like I'll have about 72 LED's wrapped around it.  The bottom cover will be held in place with two 3mm screws.  I have no switch for this thing, and since it's a 24 hour challenge, I'm likely to just use the ends of the wire, twisted together to close the circuit as a switch.  I'll decide tomorrow if I can do anything better.
Picture
Picture
2/5/2015 12:35am
Doo-Dad for day 1 is complete.  I made a few mistakes that needed to be resolved in order to make it work.  First, the 1mm holes for the wires to pass through didn't actually print.  They are too small for the resolution of the printer.  I had to drill the holes manually after the parts were printed.  I'll make them 1.5mm next time around.  Second, the slots for the wires on the top were in the wrong position.  I was looking at the holes from the bottom side when I made the slots.  If I had done them correctly, the lower slot in this picture would have been to the left of center, and the upper one to the right.  I fixed it with my Xacto saw.  Third, I didn't make any accommodation for the wires to connect to the battery ends.  I filed a couple of groves in the end of the case for the wires to pass through when the cover is in place.  I also had to file a little off of the edge of the post that holds the  AAA battery for its wire to pass.  Fourth, I made the screw holes for the battery cover too large and the 3mm screws had nothing to thread into.  It didn't really matter because the wires created a pretty nice friction fit for the cover.  Next time, I'll make the holes 3.4mm diameter instead of 3.8mm. Finally, I didn't have a switch.  But this was also easily taken care of by simply using the battery cover to press the wires onto the battery ends when the cover is installed.  I think it's worth mentioning that I had a near miss with the super glue that I used to stick the top onto the body.  There was a little dried up blob of glue in the tip of the nozzle.  I was squeezing the tube when the dried glue popped out and a big gush of glue came out.  Most of it landed on the part, and a little went onto the back of my hand.  I just rinsed it off of my hand without touching it, and after the little bit that was left dried up, I took it off with a little acetone.  Although this thing didn't turn out perfect, the design file could easily be updated if I wanted to produce something people would want.  Success.

Picture
LED insert for Ikea Lantern
Picture
#Abstract2Actual 5:20
2/8/2014 Post build update:
I modified the design to include an on-off switch and posted it on Thingiverse as thing 673491.
I also posted the instructions on Youtube as"Ikea ROTERA light package"
Picture
LED light package w/rocker switch #Abstract2Actual 6:05
0 Comments

Build a motor control panel

2/2/2015

1 Comment

 
My dad is building an inch-and-a-half scale model train that runs on 200 feet of track in his back yard.  The train is big enough to sit on and ride as it runs up and down the track.  It is driven by a 24VDC wheelchair motor powered by 2 12v sealed lead acid batteries.  Dad's a machinist, and although he understands basic electricity, he really had no idea how to control the motor speed.  The answer was to use this DC Motor PWM Speed Control board from Amazon.com, along with an on-off switch with a cool blue cover, a forward-reverse switch, some wiring, and a fuse block.  I printed the panel with raised lettering that I later painted with an off-white enamel.  I designed and printed the orange lever to replace the little knob that originally came with the speed controller.  The result was this cool looking control panel for my dad's train.  I'll update this post with pictures of the entire train once my dad has it installed.
Picture
40 Amp DC motor control panel #Abstract2Actual 5:12
1 Comment
    View my profile on LinkedIn

    TJ Emsley

    Lifetime tinkerer.

    Archives

    October 2022
    January 2021
    November 2020
    October 2020
    September 2020
    February 2018
    January 2018
    January 2017
    October 2016
    August 2016
    July 2016
    June 2016
    May 2015
    April 2015
    March 2015
    February 2015
    December 2014
    October 2014
    August 2014
    July 2014
    May 2014
    April 2014
    March 2014
    November 2013
    October 2013

    Categories

    All
    3d Design
    3d Printing
    Open Source

    RSS Feed


Proudly powered by Weebly