| I was having a conversation with my brother Frank before the holidays about 3D printing and he said that he couldn't get over the thought that you could 3D print the empire state building with all of the detailed interior, including people at their desks, furniture, etc. The part that flipped him out was that by the end of the print job, all of these things would be inside the building, but you couldn't see them or do anything about it. With that, I decided to make him a nice little box for Christmas that looks like this ----------------> | Abstract2Actual: 6:30 |
I remixed --> cerberus333's kitten design <-- from Thingiverse.com and built a box around it.
My remixed file can also be found on Thingiverse.com as thing:650446
My remixed file can also be found on Thingiverse.com as thing:650446
 |  |  | Next on the Christmas gift list was also a remix of an existing design from Thingiverse, an archery fletching tool. This original design by Boardy42 had helical fletches, which was not quite |
what I needed. I remixed the design for long straight fletches and posted this new design to Thingiverse as thing 609300. Subsequently, phiz made one of these using my design and found that the nock orientation was off by 90 degrees for compound bows. phiz made an adapter that you can just drop in to the jig and fletch arrows for compound bows.
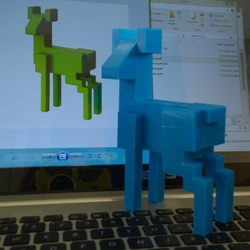 Ikea "Samspelt" in the background, behind my puzzle toy 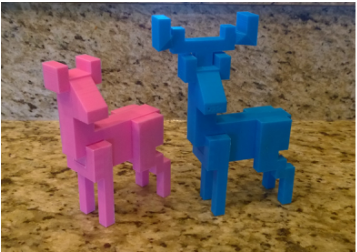 Reindeer #Abstract2Actual: 14:10 | I made some cute little reindeer for my grandkids based on a the Samspelt decorative sculpture I saw at Ikea. I made them as little puzzles just for fun. I posted one of my designs on Thingiverse as thing 567557. I also found a pretty neat website where you can sell your 3d design files at www.Redpah.com. I have the doe available for free there too, and if you want the buck & doe designs, you can get them for just 99 cents. Later, I scaled them down to 33% and printed a whole herd of them as Christmas ornaments. They looked pretty cool on my unconventional Christmas Tree. | 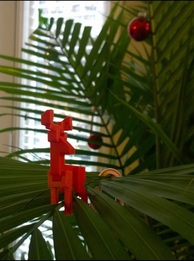 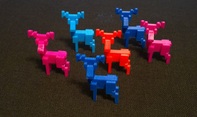 Reindeer ornaments 33% scale #Abstract2Actual: 2:05 |
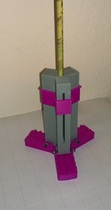
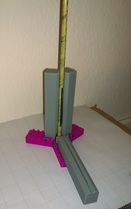
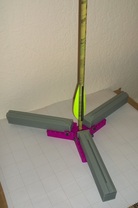
| Finally, I designed and made a pretty cool looking birdhouse for my brother's girlfriend. This was definitely the most challenging piece I've ever attempted to design and print. I based this loosely on the lamp design that I had built previously. The first challenge to overcome was getting the correct angle on the roof so that I could print it without support and not have any holes in the underside. Printing would start off well, but the closer it got to the peak, the smaller the print layers were. This meant that the previous layer was not very cool when laying the next layer on top of it. The result was that the previous layer would stick to the extruder and peel the layer off. After three attempts, I finally got an acceptable print. It wasn't perfect, but it was pretty damned good. Printing the base was really problematic. I had |  Birdhouse #Abstract2Actual 23 days 8:43 |
issues with layer separation, which were resolved by slowing down the print speed, thinning layers to .1mm, reducing infill to 15%, and putting a box around the printer to keep the temperature stable for the entirety of the print job. Then I started having problems with the extruder jamming up, so instead of printing this on my the big X3REX printer , I switched to my modified Prusa i3 . The i3 is my workhorse and X3REX has not had all the bugs worked out of it yet. particularly, it has trouble with z plane consistency in the first 20 or so layers. For this print, early z axis moves were not critical, so I thought X3REX might do the job, but extruder jams on a 27 hour print job could not be tolerated. The Prusa i3 ran well until I started having issues with the extruder once the print job got to around 60%. This was really killing me because the print job would run for 18-20 hours, then start messing up. I never completely resolved this issue. I believe that with the box around the printer, the heat sink above the extruder hot end heats up to the point that it softens the filament before it gets into the extrusion chamber. Pressure from the extrusion gear then causes the filament to expand to the point that it cannot pass into the hot end. I reduced the retraction length to 1 mm which seemed to help, and on the sixth attempt to print this, it got to within the last couple of hours before starting to mess up. I paused the print job, forced the filament through the extruder, and resumed printing. There was quite a bit of poorly formed plastic in the top inch of the print that I wound up filling with epoxy. I painted the top section blue to hide the epoxy, and the end result looked pretty good. Shelly liked it, so I will call it a success.
You can find the design files for this as Thingiverse thing 652510. and on Redpah as product 1241. Not including the failed print jobs, this project is comprised of 2029 layers, uses over 50 meters of filament, requires 651,418 separate print commands, and takes 38 hours 47 minutes to print. You cannot print this on a standard Prusa i3 printer because the build height is 186mm (7.32 inches). My Prusa i3 design was modified to accommodate 230mm (9 inches) build height, and X3REX can print 254mm high (10 inches)
You can find the design files for this as Thingiverse thing 652510. and on Redpah as product 1241. Not including the failed print jobs, this project is comprised of 2029 layers, uses over 50 meters of filament, requires 651,418 separate print commands, and takes 38 hours 47 minutes to print. You cannot print this on a standard Prusa i3 printer because the build height is 186mm (7.32 inches). My Prusa i3 design was modified to accommodate 230mm (9 inches) build height, and X3REX can print 254mm high (10 inches)

 RSS Feed