A couple of years ago I created a universal adapter that lets you mount any mobile phone to a telescope. Using that device, I connected my 41 Megapixel Nokia Lumia 1020 to an Orion Starblast reflector telescope and took some really spectacular shots of the moon and Jupiter. The cost of all that equipment was around $800.
I wondered what I could do with a $5 Raspberry Pi Zero, a $15 Pi Camera, a $10 USB shield, and a discarded (as in free) old Tasco 45X refractor telescope. I already had the other computing components, keyboard, mouse, HDMI monitor, and wireless NIC, so I am not counting the cost of those parts. Add the cost of ABS media at $2 and we'll call this a $32 project. Below is the picture I got. It was much better than I expected. Read on below the picture to see how to do it.
I wondered what I could do with a $5 Raspberry Pi Zero, a $15 Pi Camera, a $10 USB shield, and a discarded (as in free) old Tasco 45X refractor telescope. I already had the other computing components, keyboard, mouse, HDMI monitor, and wireless NIC, so I am not counting the cost of those parts. Add the cost of ABS media at $2 and we'll call this a $32 project. Below is the picture I got. It was much better than I expected. Read on below the picture to see how to do it.
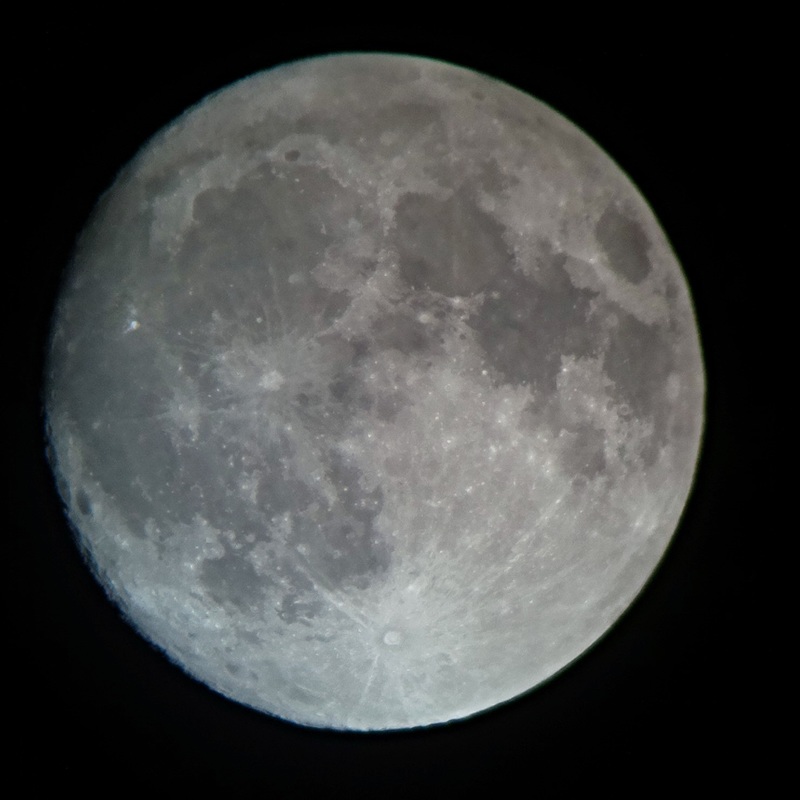
Raspberry Pi Camera moonshot
Using Sketchup, I designed the camera mount and computer bracket. The design consists of 6 different parts. The design file is available on Thingiverse as thing 1831563
The camera mount is made up of a split ring that can be sized to the barrel of the eyepiece, a ring that slips over the split rings, and a plate, which sits inside the ring, holds the Pi camera. I designed this in multiple parts for two reasons: primarily, I don't want to print support material; and I want to be able to use telescopes with different sized eyepieces. I avoid support because it is messy and can be a pain in the rear to remove.
The computer bracket is a plate, some spacers, and a ring that clips on to the camera ring. I glued the plate onto the ring with a bit of acetone.
The Pi Zero is running a plain jane distribution of Raspbian Jessie. I wrote a python script that allows me to preview, make some exposure adjustments, choose between images or video, and trigger the camera using the keyboard. Having the ability to trigger the camera without touching the telescope is a HUGE benefit because the settling time for the scope is often 15 - 20 seconds.
This is a work in progress. I will post the project on GitHub. Ultimately I'd like to run this through a web interface so I can get rid of the monitor and keyboard.
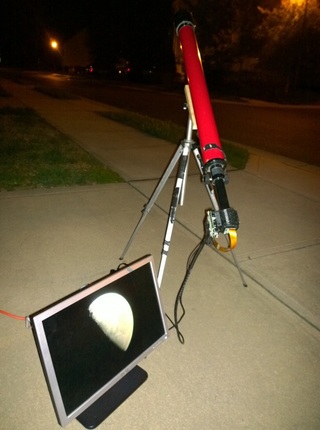 Original Tasco rig | 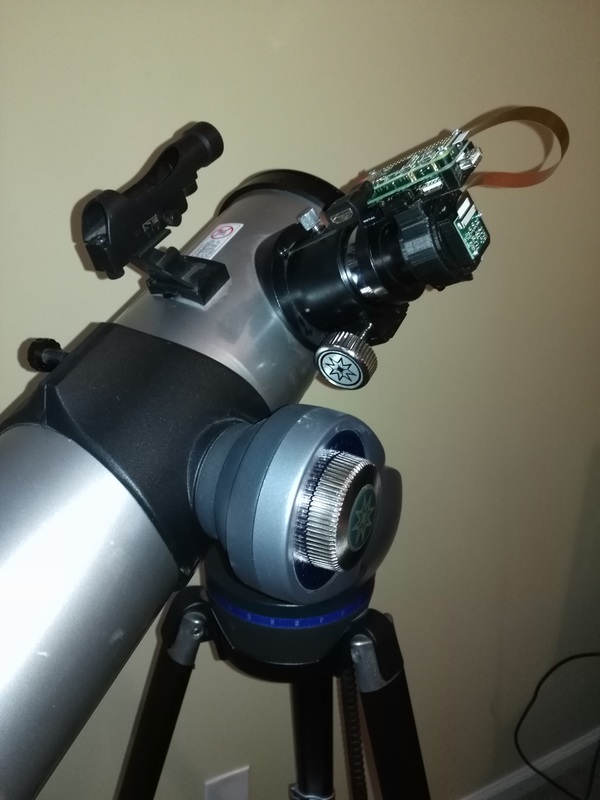 Meade rig with bigger eyepice |

 RSS Feed